Overview
- A SUMO Appointment has 2 status options = “Booked” or “Canceled”.
- A SUMO Appointment Participant has 3 status options = “Awaiting, Confirmed, Declined”.
- A SUMO Appointment Participant also has a “No-Show” checkbox.
How does this work in practice?
Each SUMO appointment can have multiple participants. An appointment can be “Booked” with 3 participants, 1 can no-show, and the other 2 can show.
For example, Appointment #123 has a Doctor, A Mother, and her Child. The child was unable to attend. Therefore, a staff member marked the child as a no-show. In this scenario, the following would happen:
- The appointment on the calendar would have a yellow warning symbol
 next to it, indicating that someone on the appointment no-showed.
 - The appointment status would remain “Booked”, since it was not “Canceled”.
- The appointment no-show checkbox for the child would be “True” or checked.
- The appointment participant status for the child could be any of the 3 options (Awaiting, Confirmed, Declined).
How do I mark a No-Show?
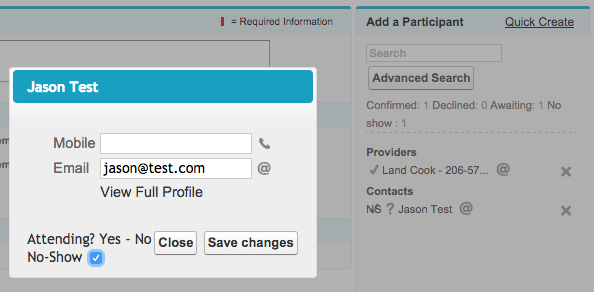
- Edit and appointment by either clicking on the appointment on the calendar or clicking EDIT next to an appointment.
- Click on the name in the participant list on the right that you would like to make as a No-Show.
- On the popup window check the “No-Show” box.
- Click “Save Changes”. Notice the NS next to their name in the Participant list.
- Save the appointment.
- Notice the yellow warning symbol on the appointment on the calendar.
How do I measure No-Show trends and metrics?
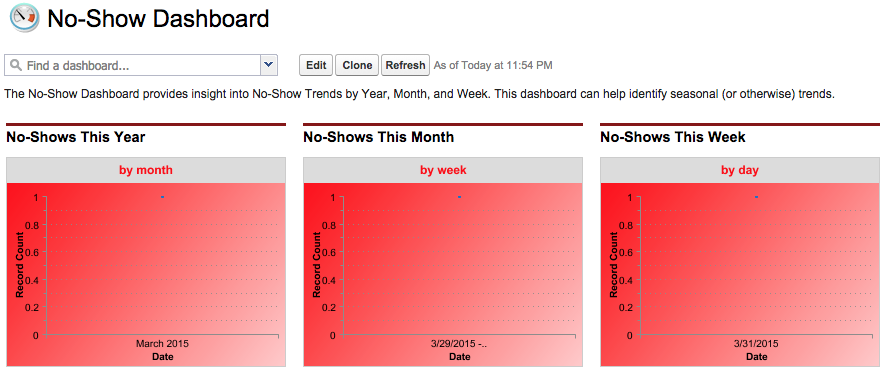
- On the main tab nav menu, click on “Dashboards” tab.
- Click the “Find a Dashboard” picklist and choose the “No-Show Dashboard”.
- Click on any graph to see the report data.
*Also you may create your own custom report to report on Appointments with Appointment Participants where No-Show checkbox = True.