SUMO Self-Scheduling lets people visit an online site that is branded with your company logo, and self-schedule themselves an appointment with your service providers. This Admin Guide outlines the various ways in which the self-scheduling module may be configured and how to configure it.
How it Works
It’s important to first understand how the Self-Scheduling Module works. The following options are supported:
5 Potential Steps in the Process
The SUMO Self-Scheduling Module is highly configurable, but may have up to generally 5 steps:
- WHERE
- WHAT
- WHO
- WHEN
- THANK YOU
It’s important to understand how these steps work and what options are available within each of these 5 steps.
WHERE
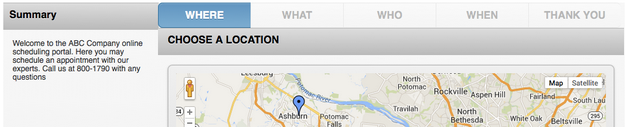
If your organization has more than one location that a person can schedule an appointment into, then they will be able to see your locations on a map and choose the location they wish to schedule into. Conversely, if your organization only has 1 location, this step is skipped entirely.
WHAT
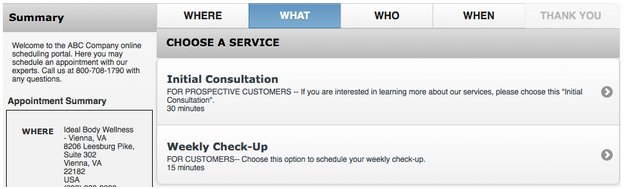
While you may choose to turn off the WHAT step, if you would like to offer people the opportunity to choose from a list of services, you may expose the WHAT step. Each service has a name, description, and a duration.
WHO
There are several options on the WHO Step.
1. Team Auto-Assignment – You may turn off the WHO step and auto-assign appointments across a team of people.
2. Users Choose – You may turn on the WHO step and allow users to choose their provider.
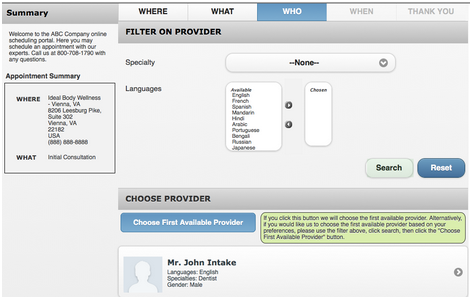
On the WHO Step, the person may have several options to choose who they will meet with:
- Filters — You may turn on any filters you like, such as Gender, to allow the person to filter on males, and choose to meet with a male provider. You may also turn off filters entirely. These settings are found in SUMO Setting > Custom Fields > Self-Scheduling Provider Search Criteria.
- First Available — The person may click the “First Available” button to choose the first available provider.
- Select Provider — The person may review the providers in a list and choose a provider to meet with.
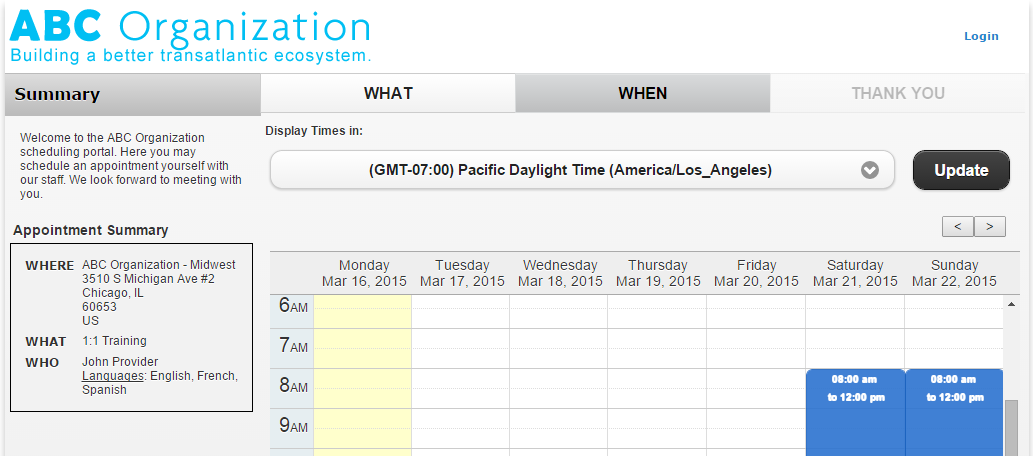
WHEN
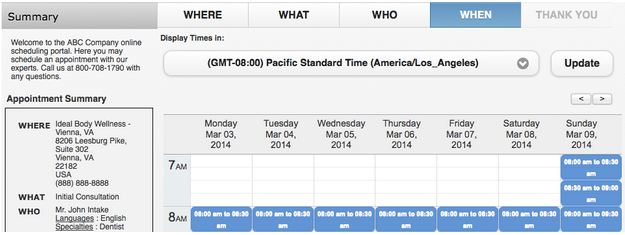
Here the person is displayed appointment openings and may choose one that fits their schedule. SUMO will automatically determine their time zone and render the appointments in the time relative to them.
LOGIN / 30-SECOND REGISTRATION
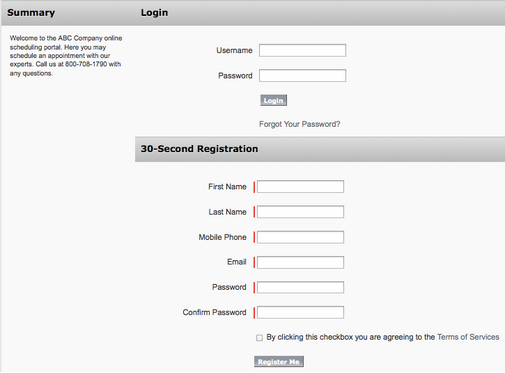
An intermediary step in the process is the Login / 30-Second Registration step. Here the user has a few options:
- Login — enter username and password and login.
- Forgot Password — have your password emailed to you, if you forgot it.
- Register — Complete the 30-second registration process.
- Terms of Service — You must Update the Terms of Service with your Terms of Service.
THANK YOU
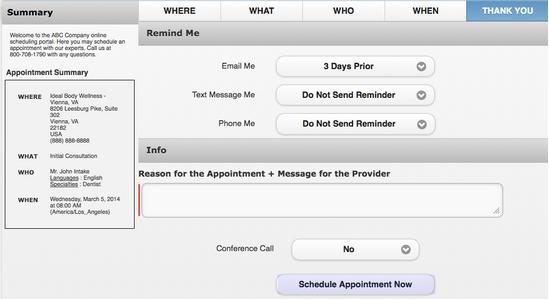
Here the person may choose the following:
- Reminder options (email, text message, phone reminder)
- Conference Call or On Location
- Purpose for Appointment + Message for the Provider
And finally, they can book the appointment.
Appointment Summary
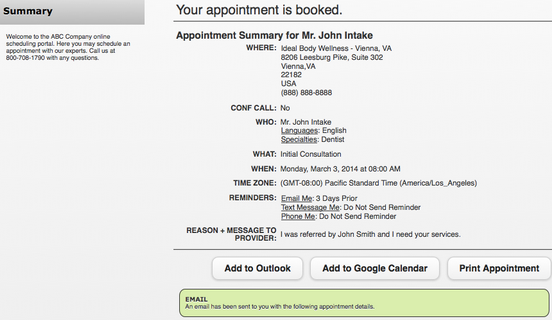
Once they have booked the appointment the user will be presented the Appointment Summary, where they can:
- Add to Outlook
- Add to Google Calendar
- Print Appointment