Learn how to use the SUMO Portal here.
*Required if you choose Customer Scheduling Mode in the Online Scheduling Site – Global Settings.
If you plan to allow your contacts in SUMO to register for a self-scheduling process, then you need to take a few minutes to setup the Scheduling Portal (aka Customer Portal). Once the user has logged in they are technically now in the SUMO Customer Portal, where they have a few more options.
What are the Benefits?
The people self-scheduling with you (customers, patients, partners, etc) will be able to:
- View My Appointments – View all Open Appointments, Past Appointments, and Incomplete Appointments (cancelations or no shows).
- Reschedule Appointments – Choose an existing open appointment and reschedule it.
- Add to Outlook or Google Calendar – Click a button and add the appointment you self-scheduled onto your Outlook or Google calendar.
What are the Disadvantages?
- Login Required – Users must login to get access to My Appointments, Reschedule, etc…
Setup Your Domain
- Click on your name in the top right and then choose SETUP.
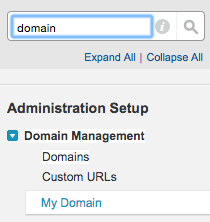
- Enter “domain” into the search box on the top left.
- Click on “My Domain”.
- Enter a domain name, like “scheduling” or “your business name”.
- Read the Terms and check the box next to “I agree to the Terms”.
- Click Register Domain
Upload Your Logo
- In the Tabbed Menu at the top, click on the + on the right.
- Click on Documents
- Choose the SUMO Documents folder and click GO.
- Click the NEW button.
- Upload your logo (recommend size = 148×55).
Set “Authenticated Website” Profile Properly
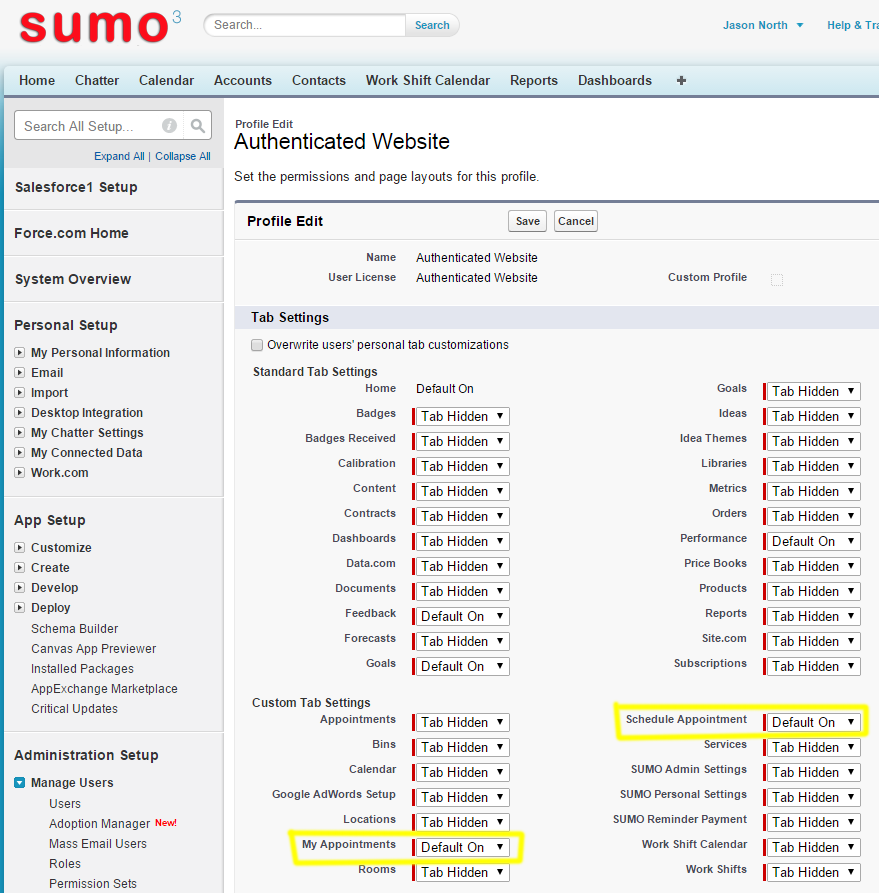
Click to enlarge.
- Login to SUMO, click on your name in top right, and click on Setup
- Click on Customize > Customer Portal > Settings
- Click the name of your Customer Portal (not Edit).
- Scroll down to the Assigned Profiles section and look for “Authenticated Website” profile.
- Click on the “Authenticate Website” profile, then click the “Edit” button.
- As shown in the screenshot above, make sure the “Schedule Appointment” and “My Appointments” custom tabs are set to “Default On”.
Find Customer Portal Settings
- Click on your name in the top right and then choose SETUP.
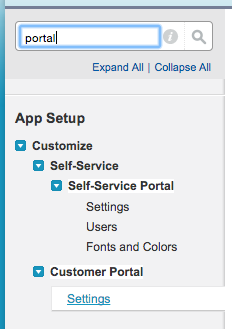
- Enter “Portal” into the search box on the top left.
- Click on “Settings” under Customer Portal
Create Customer Portal
- Click the NEW button.
- Enter a Name and Description.
- Check the box Login Enabled.
- Specify the Adminstrator. This user will receive critical emails if/when there are problems with the portal.
- Set the Logout URL to be http://MyDomain.force.com/VoiceReminder/forcebrain__locationDetails where you replace MyDomain with the name of your domain.
- Set the From Email Address – Set this to be the FROM email address you would like the users to see.
- Set the From Email Name – Set this to be the FROM name you would like the users to see.
- New User Template – Select this template “Customer Portal: New User Login Information (SAMPLE)”
- New Password Template – Under the “Unfiled Public Email Templates” folder, select this template “Customer Portal: Reset Password (SAMPLE)”
- Lost Password Template – Under the “Unfiled PublicEmail Templates” folder, select this same template “Customer Portal: Reset Password (SAMPLE)”
Edit Templates – Go here to learn how to edit these templates to your liking.
Assign “Authenticated Website” Profile to the Portal
- Scroll down to the Assigned Profiles section and look for “Authenticated Website” profile. If you do not see it listed, then click on the Edit Profiles button and check the box to the right of it to activate it for this Customer Portal.
Footer & Logo Setup
- Click on the magnify glass next to Footer and choose “SUMO-Customer-Portal-CSS-Footer” from the SUMO Documents folder.
- Click on the magnify glass next to Logo and choose the logo you uploaded earlier, which should also be in the SUMO Documents folder.
Self-Registration Settings
- Check the box Self-Registration Enabled.
- Registration Error Template: Under the “Unfiled Public Email Templates” folder, select the template “Customer Portal: User Self-Registration Error (SAMPLE)”
- Default New User License:Customer Portal Manager or Customer Portal Manager Custom
- Default New User Role: User
- Default New User Profile: Customer Portal Manager End User
Change Portal Fonts & Colors
In Portal Settings, you can click on the button “Change Portal Fonts and Colors” to customize the look and feel.
Setup the Home Tab
In the SUMO Portal, there is a HOME tab on the far left.

If you would like to allow users to edit their time zone or user profile, it’s important to setup the Home tab appropriately.
- When logged into SUMO Desktop click on your name in the top right and then click on Setup.
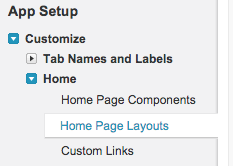
- Then go to App Setup > Customize > Home > Home Page Layouts
- Click on the “New” button.
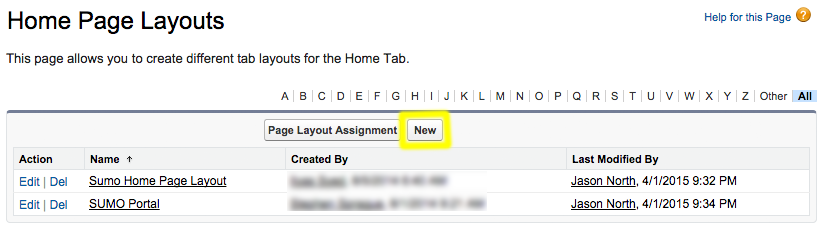
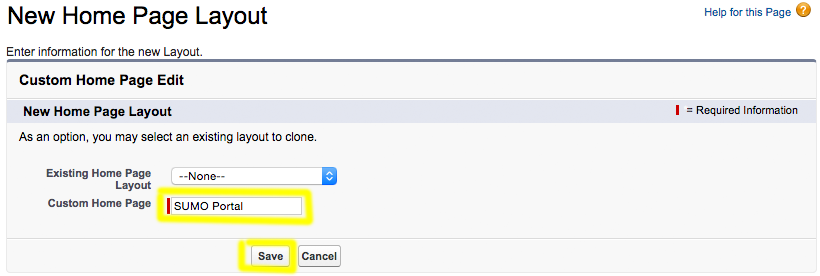
- Give the Custom Home Page a name like “SUMO Portal” and click save.
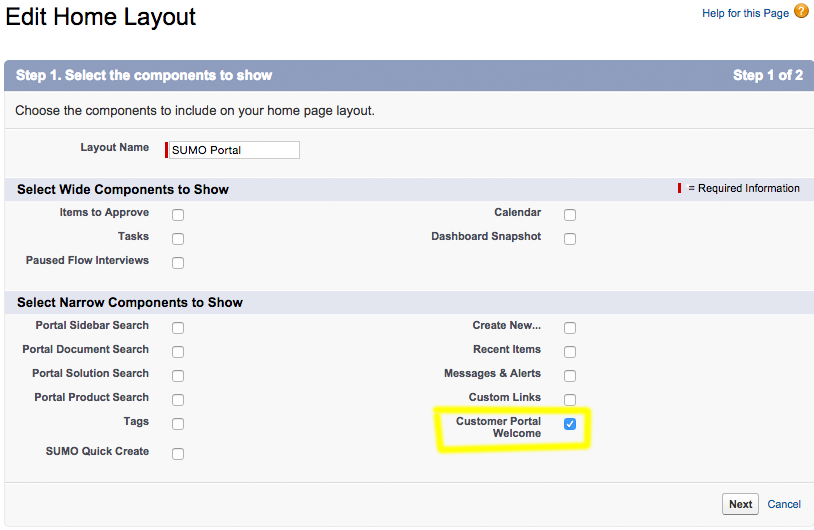
- Make sure you check the box in the lower left “Customer Portal Welcome”. You will not need to check any of the other boxes.
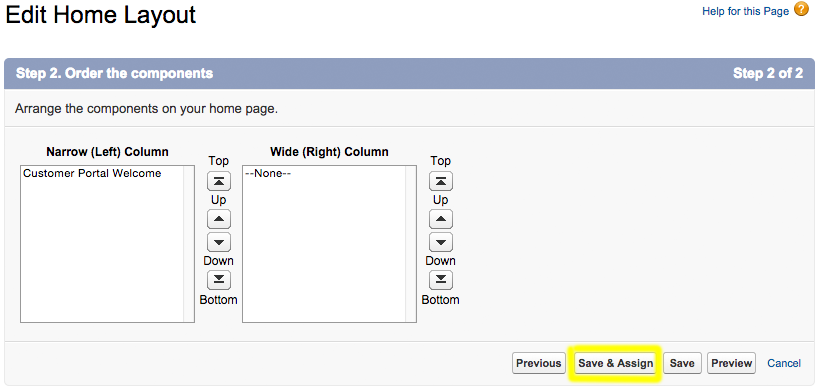
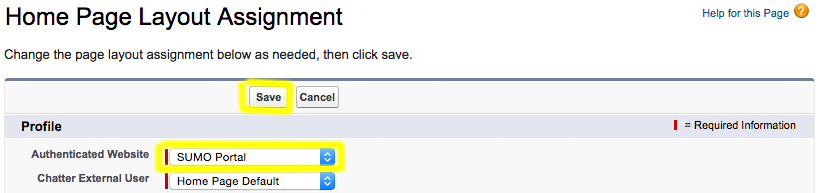
- Click Save & Assign
- Make sure the “Authenticated Website” Profile has yours selected (“SUMO Portal”, if you named it this). Click save and you’re done.
How to Add a Graphical Banner to the Home Page?
- App Setup > Customize > Home > Home Page Components
- Click “New” button.
- IMAGE OR HTML?
Additional Info
For more information regarding setting up the Customer Portal you may reference these instructions.